Implementing Push Notifications in Flutter Using Firebase
Unlocking the Power of Push Notifications in Flutter with Firebase Cloud
Push notifications are an essential aspect of modern mobile applications, allowing developers to engage users even when they are not actively using the app. In Flutter, integrating push notifications can be efficiently done through Firebase Cloud Messaging (FCM). In this tutorial, we'll walk through the steps to set up push notifications in a Flutter app using Firebase and also open specific page when user tap on notification.Follow steps to create push notification in both project.
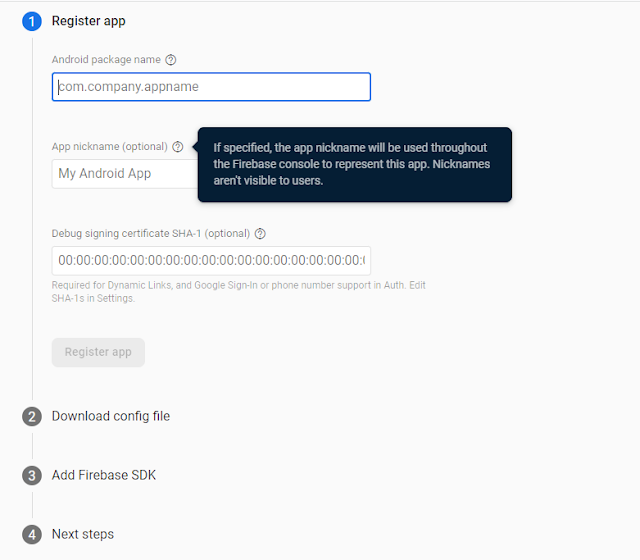
After Creating Project add app for both IOS and Android Project.
For Both IOS and Android project add Package name. Package name should be same as your package name in Android and Project.
Click on Register App
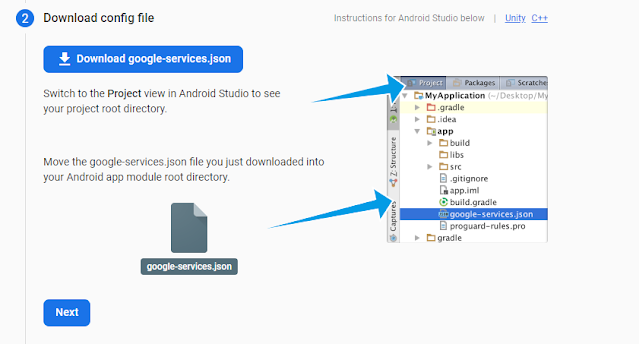
If you are in android app then download google-services.json else if you are in ios app then download "GoogleService-Info.plist" file
Click Next then click Next then Click Continue to console button.
Step 1: Set up Firebase Project
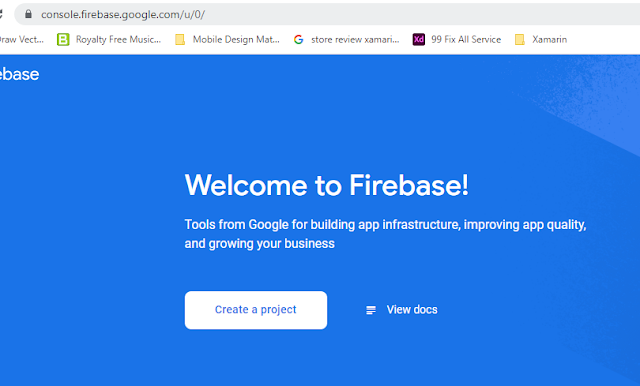
Firstly, ensure you have a Firebase project created. If not, you can create one from the Firebase Console. Once your project is set up, follow these steps:
- In the project-level build.gradle file (android/build.gradle), add the Google services classpath dependency.
dependencies {
    classpath 'com.google.gms:google-services:4.4.1'
}- Ensure google() is added in the repositories block in the same file.
- In the app-level build.gradle file (android/app/build.gradle), add the Google Services plugin and Firebase BOM dependency.
plugins {
    id "com.google.gms.google-services"
}

dependencies {
    implementation platform("com.google.firebase:firebase-bom:32.8.0")
}flutter pub add firebase_core
flutter pub add firebase_messaging
flutter runimport 'package:firebase_messaging/firebase_messaging.dart';
class FirebaseApi {
final _firebaseMessaging = FirebaseMessaging.instance;
Future<void> initNotifications() async {
await _firebaseMessaging.requestPermission();
final fCMToken = await _firebaseMessaging.getToken();
print('Token: $fCMToken');
}
}import 'dart:io';
import 'package:firebase_core/firebase_core.dart';
import 'package:flutter/material.dart';
import 'package:pushnotification/api/firebase_api.dart';
void main() async {
WidgetsFlutterBinding.ensureInitialized();
Platform.isAndroid
? await Firebase.initializeApp(
options: const FirebaseOptions(
apiKey: 'YOUR_API_KEY',
appId: 'YOUR_APP_ID',
messagingSenderId: 'YOUR_SENDER_ID',
projectId: 'YOUR_PROJECT_ID'))
: await Firebase.initializeApp();
await FirebaseApi().initNotifications();
runApp(const MyApp());
}When you run the app you will get token "Run" window. copy that token use in firebase console to send notification.
Now we will test from firebase console.
Go to firebase console -> go to cloud messaging -> Click on New Campaign or Click on Sent first message.
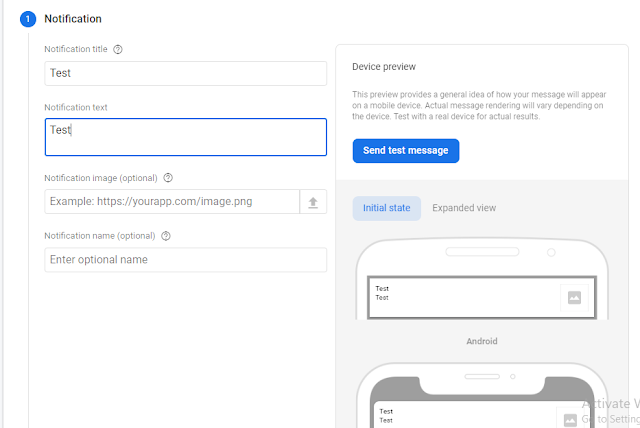
In Notification Section
Enter Title for Notification Title
Enter Text for Notification
Click on Send test message button
Go to Target Section
Select the app you want to send and click next button
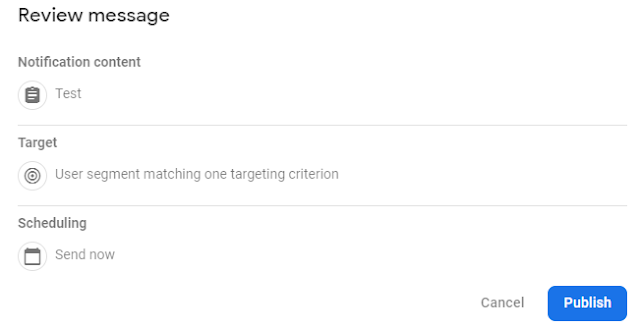
Go to Scheduling Section: select from the option and then click next button and then click on review button
Congratulations! You have successfully implemented push notifications in your Flutter app using Firebase. This feature can significantly enhance user engagement and interaction within your application.
In conclusion, implementing push notifications in a Flutter application using Firebase Cloud Messaging (FCM) can greatly enhance user engagement and interaction. Through this tutorial, we've covered the all steps required to integrate push notifications seamlessly into your Flutter project:




Comments
Post a Comment